Sertifier x Zapier Integration
Table of Contents
What is Sertifier?
Sertifier is a versatile platform designed for creating and managing digital certificates and badges. It empowers organizations to issue secure, verifiable credentials to individuals upon completion of courses, events, or other achievements. Sertifier simplifies the certificate issuance process, offering tools for designing customizable credentials that reflect the organization’s brand and standards. It also provides robust features for tracking, managing, and verifying digital credentials, ensuring credibility and authenticity.
What is Zapier?
Zapier is an automation tool that connects thousands of web applications, allowing users to automate workflows without the need for coding skills. It enables seamless integration between different apps and services by creating automated workflows called “Zaps”. These Zaps trigger actions in one app based on events or data changes in another, automating tasks such as data synchronization, notifications, and more. Zapier enhances productivity by reducing manual work, improving efficiency, and enabling businesses to integrate and automate their processes effortlessly.
Why Use Zapier Integrations with Sertifier?
Integrating Sertifier with other platforms, such as learning management systems (LMS), CRM systems, event management tools, or productivity apps, offers several benefits:
- Automation: Automates the issuance of digital certificates and badges based on predefined criteria or events, saving time and reducing administrative burden.
- Enhanced Workflow: Streamlines processes by synchronizing data between systems, ensuring consistency and accuracy in credential management.
- Scalability: Scales to handle large volumes of certificates efficiently, supporting organizational growth and expanded credentialing needs.
- Customization: Allows customization of certificate details, designs, and communication templates to align with organizational branding and messaging.
- Seamless User Experience: Improves user experience by automating certificate delivery and enhancing the accessibility and usability of digital credentials.
By leveraging integrations with Sertifier, organizations can optimize their credentialing processes, enhance stakeholder engagement, and maintain high standards of credential authenticity and management across various digital platforms.
How to Integrate Sertifier with Zapier (Example integration with Google Sheets)
A few step guide on how to Integrate Sertifier and Google Sheets on Zapier.
Preparation Step: Sertifier
To begin, navigate to the “Advanced” section and select the “Integrations” tab from the menu on the left. Within the Integrations tab, proceed by clicking on “Create New Integration.”
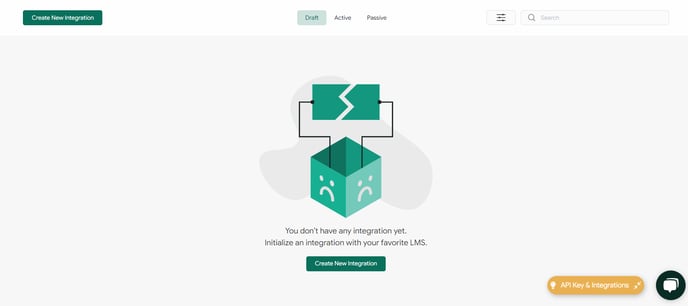
After selecting “Create New Integration,” a list of integrations will appear. Choose Zapier from the list to proceed. Upon clicking Create New Integration, you will be directed to the credential campaign page where you can select or create the components of the credential which are the Design, Detail and the Email Template.
Creating Details
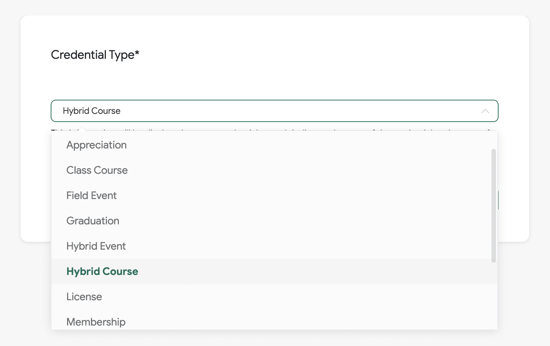
The Credential Details page is where you can input all the essential information for your digital credentials. This section enables you to complete the necessary details for your certificates. Click here for more detailed information on how to create certificate details.
Design Credential
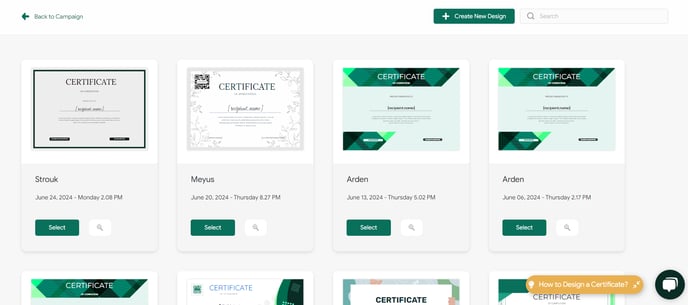
Click the Select Certificate/Badge Design button to choose your preferred design. If you do not have a design yet, you can click on Create New Design to access the Credential Designer. You can click here for more detailed information about the Credential Designer.
Email Template
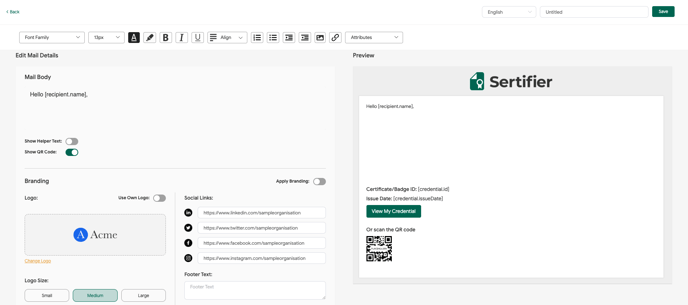
The Email Template tab is where you can customize the email that will be sent to your certificate recipients. In this tab, you can customize your mail, and you can find more detailed information here.
For a complete guide to sending Digital Credentials, you can click here
Preparation Step: Google Sheets
Create a Google Sheets as you wish, but do not forget to add two questions: “First and Last Name” and “Email Address”. That’s it! If you are planning to add more variables to your credentials, please add them to the sheet. For example, if you are going to create a custom variable, you need to create and define a column for it.
Make sure that you save your answers as a spreadsheet.
Integration On Zapier
Access your Zapier account. Locate the “Create” button on the upper-left corner of the main page, click on it, and select Zaps.
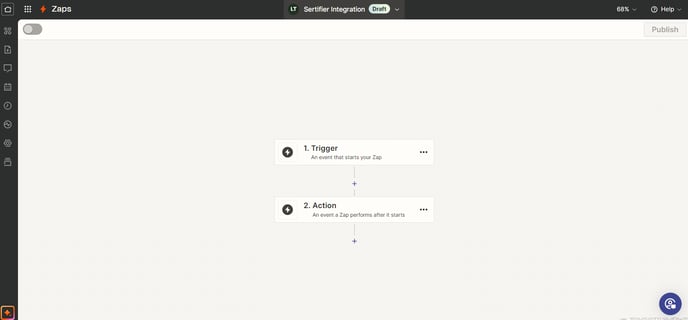
Once you access the Zap editor, you can begin configuring your integration. Start by renaming your Zap in the designated area at the top.
Integration Step: Google Sheets
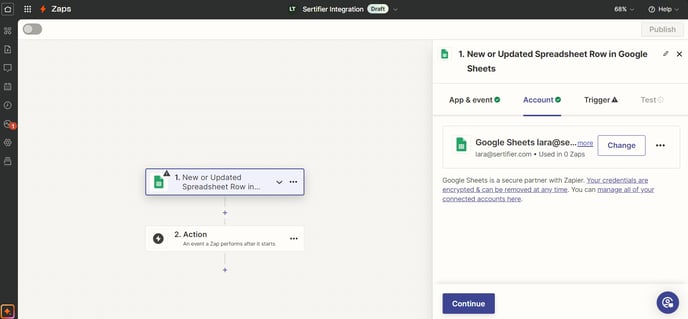
Click Trigger within the Zap editor and choose Google Sheets. Once you select your integration, extend the “Event” menu and select “New or Updated Spreadsheet Row”, then click “Continue”.
You should see “Sign in to Google Sheets” option within the menu . Click that and activate your Google Account on the pop-up window. This is necessary for Zapier to connect two applications.
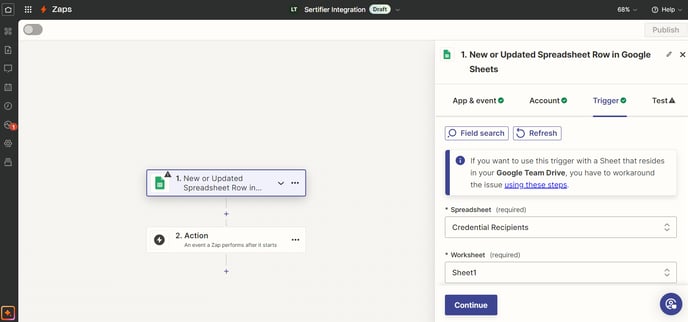
Now in the “Trigger” section. Choose the spreadsheet that you have prepared in the Spreadsheet section. After selecting your worksheet, press the continue button and complete it.
Check your Zap in the test section. So you can observe if an error has occurred.
Integration Step: Sertifier
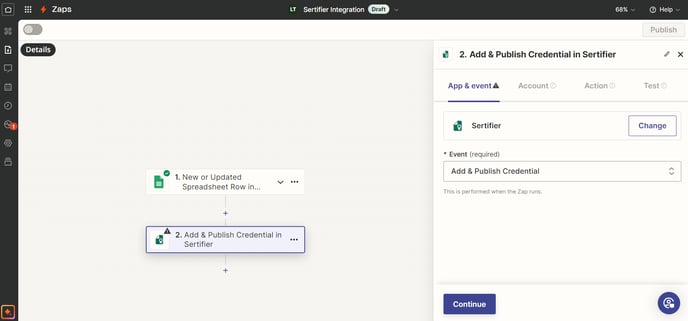
The “Action” part also has a section for choosing an app and event. Type “Sertifier” into the search box and click on our logo below.
Extend the “Event” menu and select the “Add & Publish Campaign” option.
New Attributes: This Zap gets triggered when a new attribute is created.
New Badge Design: This Zap gets triggered when a new badge is created.
New Campaign: This Zap gets triggered when a new campaign is created.
New Certificate Design: This Zap gets triggered when a new certificate design is created.
New Detail: This Zap gets triggered when a new detail is created.
New Email Template: This Zap gets triggered when a new email template is created.
New Skills: This Zap gets triggered when a new skill is created.
Now you need to select the “Choose Account” and type in your Sertifier API Key. You can find your API key in your Sertifier account under Settings>API & Integrations.
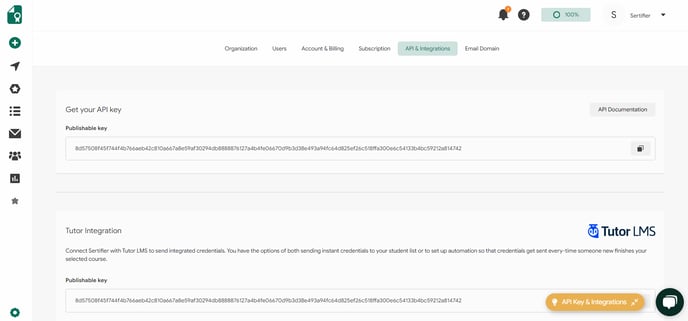
In the “Action” part, we enter the necessary information and complete our Zap. The meaning of the blanks is explained below.
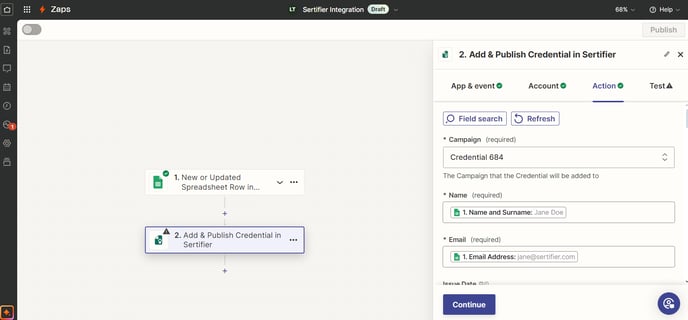
Delivery: This part is about the delivery that you want Zapier to work on. For this to work, you should select the Zapier integrated campaign you have created earlier within Sertifier.
Name: Select the answer field related to the “name and surname” from the trigger app.
Email: Select the answer field related to the “email” from the trigger app.
Issue Date: You can select it to be set to any time you want, or the time that the trigger has happened.
Expire Date: The date if you want the issued certificates to be expired. This is not required.
Quick Publish: If you want the certificates to be published at the time of form submission select, “true”
Attributes: If you have added any customized attributes in the certificate design, you can specify those to be automatically filled via the information that comes from your trigger application.
Let’s test our Zap and check it one last time.
Your Zap is ready! Now turn it on with the button below or on the top right.


